
Extrication Tips: Raising the roof
Randy Schmitz
Features Extrication TrainingWhen it comes to patient removal from crashed vehicles there are many options to be considered regarding the path of egress – issues such as access to the patient, degree or level of entrapment, and compartment intrusion. Rescuers need to determine the safest, most effective and least time-consuming path of patient egress based on the patient’s condition.
 |
|
When it comes to patient removal from crashed vehicles there are many options to be considered regarding the path of egress – issues such as access to the patient, degree or level of entrapment, and compartment intrusion. Rescuers need to determine the safest, most effective and least time-consuming path of patient egress based on the patient’s condition.
Once those conditions have been assessed, one other important decision needs to be made: Is this a rapid extrication with a life-over-limb mindset, or is there more time to spend on patient removal? We also need to be clear on what rapid extrication really means.
Rapid extrication is the removal of a patient(s) from a hazardous environment or life-threatening situation as quickly and safely as possible while using as much packaging and stabilization as the situation allows.
From an emergency medical perspective, positioning a patient on a backboard in a straight line with minimal twisting and manipulation minimizes or reduces spinal compromises that cannot be diagnosed on scene. The acronym N.B.T – nose, belly button, toes – reminds us to keep these body parts in line and offer the patient the best possible care.
Removing the roof generally provides the most workspace for rescuers and tools inside the vehicle while offering the maximum amount of removal space for occupants. But, if time is working against a critical patient, leaving the roof intact and creating patient-removal space is sometimes the answer. The rear-window tent is a technique for quickly removing the patient (or if the roof is built with ultra high-strength steel and your hydraulic cutters are not up to the task).
 |
|
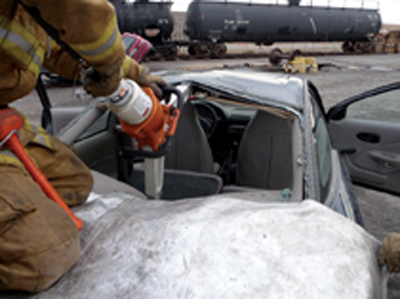
| Photo 1: Extend arms to collapse trunk deck and create tenting effect.
|
|
 |
|
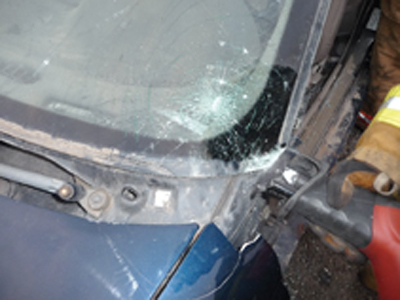
| Photo 2: Cuts must be in line with bottom of the windshield. |
|
 |
|
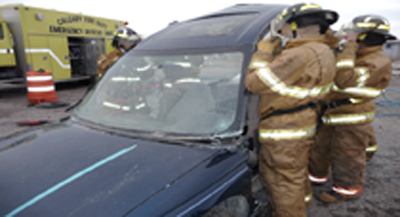
| Photo 3: With two to four rescuers, start to lift the rear of the roof.
|
|
 |
|
| Photo 4: Flip roof toward the hood.
|
|
 |
|
| Photo 5: Bottom of windshield will dislodge from top of dash.
|
|
 |
|
| Photo 6: If displacing the roof, start by cutting the C, B and A-pillars.
|
|
 |
|
| Photo 7: To cut A-pillars, make cut with hydraulic cutters at top corners of windshield.
|
|
 |
|
| Photo 8: A 2.5-centimetre void from thickness of cutter blades.
|
|
 |
|
| Photo 9: When tips are expanded, roof will break away.
|
|
 |
|
| Photo 10: Windshield stays attached.
|
Give this a try. Break and remove the roof’s rear-window glass. Insert a hydraulic spreader in the centre of the rear-window opening – one tip of the spreader must be in contact with the edge of the roof in the centre; the other tip can spread down on the rear trunk deck or the top of the rear seat. Fully extend the spreader arms. This will collapse the trunk deck and create a tenting effect in the centre of the roof, producing a large enough hole through which a rescuer can enter and a patient can be safely removed. (See photo 1.)
Next, the seat(s) need to be reclined. If there’s not enough room for you to get a hand on the recline lever, the thin, hook end of a pike pole can be inserted from behind to grab and release the lever. For a little extra room, the head rests can usually be removed. For vehicles that have a detachable, cardboard-type trunk deck a four-foot 4×4 can be substituted for support to span across the trunk area. This gives the spreader tips enough support to spread the roof upward. If the patient is quite large, an option is to cut one side of the rear roof pillar; this will reduce the tension on one side and permit the roof to spread open much farther than the first option. This cut, however, will add more time to your platinum 10-minute time frame. Make certain that prior to any spreading or cutting into any roof structure the plastic trim is stripped, including head liners and underneath rear trunk deck bulk-heads – some manufacturers will install roof curtain cylinders in these unsuspecting locations. If the decision is made to remove the roof, remember, as always, that crew and patient safety are paramount.
One other issue that has not had much attention is the cutting of laminated windshield glass. Most rescuers, including me, haven’t put much thought into the hazards of cutting laminated glass. My curiosity about this stems from something I witnessed a couple of years ago when I was judging an extrication challenge on the coast of British Columbia. The challenge was running a bit late and it was just before dusk. The team competing was halfway into its scenario when the call was made to completely remove the roof for a straight up-and-out patient egress. All pillars of the roof were cut from back to front and then one continuous cut was made from A-pillar to A-pillar, including the laminated windshield glass. The roof was then moved to the debris pile about six metres away. The process took a respectable time of about five minutes. At all T.E.R.C.-sanctioned extrication challenges, it is mandatory that all rescuers, including the live patient, wear an N95 dust mask while removing glass. These personal protective barriers were in place at the time for the competing team. I happened to step back from the action circle by about nine metres and was facing into the sun. What I saw was a real eye opener. Everywhere I looked, for at least a 15-square-metre radius, were fine particles of glass dust that would not dissipate. I moved around the working area and every time I looked into the sun I could see the fine dust; it even extended into the crowd and no one was aware of it because the spectators were not facing into the sun. I ordered all spectators to move back until the dust settled, and told the competing crews to keep their masks on until it was safe. I had known glass dust could linger but I hadn’t realized to what extent. When I got back home I started doing some research on glass dust and the associated hazards. In discussions with many glass-replacement and windshield-glass manufacturers I was informed that today’s laminated glass is made up of 70 per cent silica and other raw materials. Modern laminated windshield glass is made of poly vinyl butyral, iron oxide, silica sand, soda ash, dolomite and limestone.
The Material Safety Data Sheet on Silica (see sidebar, below) should prompt rescuers to wear a N95-style dust mask when working around glass dust and particles. But not everyone involved at the scene wears a mask when windshield cutting is taking place. I have yet to see those working at an extrication scene put on a dust mask while cutting glass.
And what about our patients? They must be completely covered so that no glass particles or dust reach their lungs or open wounds. What about using our balaclavas or Nomex hoods? Is that not good enough? Here is a simple test: hold your balaclava up to the light. Can you see daylight through it? If you can, it may be able to stop large glass particles but it will do nothing for glass dust.
Removing the roof and cutting the windshield aren’t the only methods available to us. Here are a few methods to eliminate cutting the laminated glass and thus reduce the hazard.
- Start by stripping the interior trim on the inside of all the roof pillars to check for and avoid cutting into any un-deployed roof-curtain cylinders or seatbelt pretensioners. If the side window safety glass is still intact, manage it accordingly by rolling it down into the door, breaking it in a safe and controlled manner. Cut the rear pillars first then move onto the B-pillars and finally the A-pillars. Also, don’t forget to cut any seatbelts that may still be attached to the pillars.
- It is important to use a reciprocating saw to make these last two A-pillar cuts; the thin blade will allow a low, clean cut. Ensure the cut is made as close to the dash as possible. The blade should ride just on top of the dash but not enough to cut into it. Cut all the way through the pillar but do not cut into the windshield except for about half a centimetre. These cuts need to be in line with the bottom of the windshield where it is glued in to the frame. (See photo 2.)
- With a minimum of two rescuers but preferably four, start to lift the rear of the roof up until it is in a position close to 90 degrees. (See photos 3.)
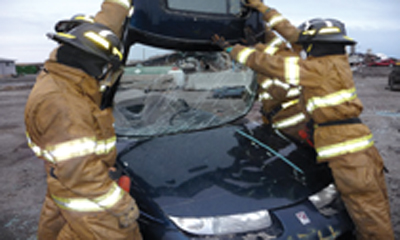
- At this point the rescuers need to take most of the weight of the roof for a moment until it is past the 90-degree break-over point. Then, continue to flip the roof over toward the hood. (See photo 4.)
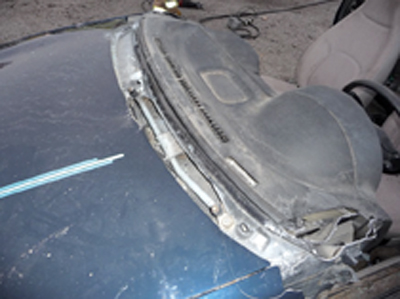
- If all goes as planned, the bottom of the windshield will dislodge from the black polyurethane glue or mastic where it attaches at the top of the dash. (See photo 5.) You can relocate the roof and windshield out of the action circle as one.
- Glass fragments should be minimal. If you suspect there may be a small number of fragments, a disposable blanket can be stuffed in between the windshield and the dash to catch any stray fragments before lifting the roof.
- Another option is to follow the procedure but instead of cutting low on the A-pillar, make the cut high. Make two relief cuts at the top of the A-pillars roughly five centimetres back from the top of the windshield, about 15 to 20 centimetres long with either a hydraulic cutter or a reciprocating saw. Be sure to avoid the strengthened areas where the sun visor bolts to the roof on the inside and check under the head liner for roof-curtain cylinders, as some manufacturers, such as Ford, hide them near this location. Now, fold the roof forward and secure it to the front of the vehicle. This procedure works well if the A-pillars are constructed of ultra high-strength steel and/or the windshield/
- A-pillars will not hinder other procedures or reduce working space.
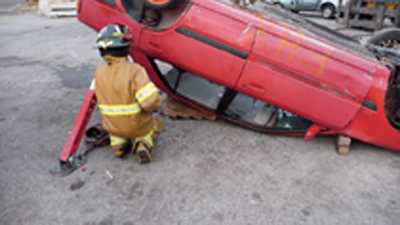
- For an upside down vehicle, stabilize the vehicle, taking care to support the weight with strut systems and remove the weight bearing down on the roof pillars to avoid further roof crush damage and injuries to patients. If there is severe roof crush, the vehicle may have to be lifted and the roof displaced or detached to assist with patient removal.
- If displacing the roof, start by cutting the C, B and A-pillars, in that order. (See photo 6.)
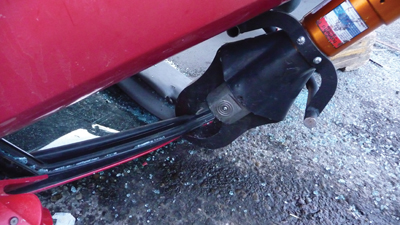
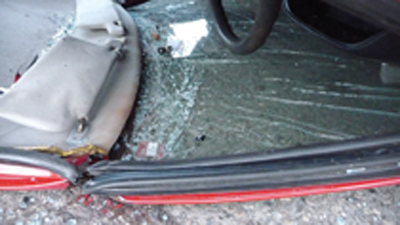
- When it is time to cut the A-pillars, make the cut with hydraulic cutters at the top corners of the windshield as indicated. (See photo 7.)
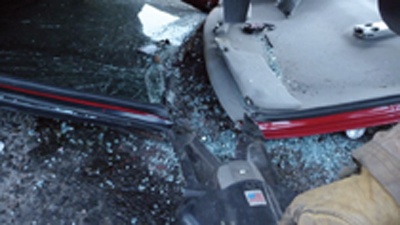
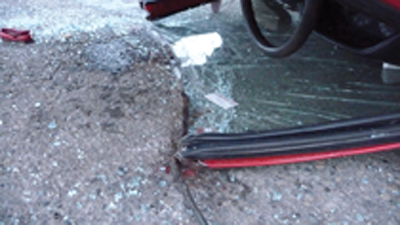
- There should be an approximately 2.5-centimetre void from the thickness of the cutter blades, which will be enough to insert the tips of a hydraulic spreader. (See photo 8.) When the spreader tips are expanded inside the cut, the roof will break away and leave the complete windshield attached to the vehicle. (See photos 9 and 10.) The vehicle will be left supported by the struts and the roof can be slid out from underneath the vehicle for access to the patients.
There are always a few negatives for every procedure:
- There is no question that a high wind will cause problems for flapping a roof over, but the odd occasion that it is strong enough to cause a problem will be far outweighed by the number of times you’ll create airborne glass dust and shards using the standard methods. The windshield must not be too severely damaged and must still be firmly mounted in the frame after a crash.
- Some A-pillars will be difficult to cut low enough to meet the bottom of the windshield; a few popular mini vans will have this issue. Judge your procedures accordingly.
- A few late-model, high-end vehicles are using laminated glass in the side windows to avoid ejections in a rollover, and as extra security against theft. A small sticker in the corner that says “security glass” identifies this type of glass. If possible, roll down these windows to avoid having to cut them.
When you have no alternative but to cut the laminated glass, duct tape across the windshield and cut through it to minimize the glass dust.
By taking advantage of options, the roof can be eliminated as a cause of entrapment or impediment to the function or effectiveness of other procedures.
Calgary firefighter and extrication instructor Randy Schmitz has been involved in the extrication field for 16 years. He can be reached at rwschmitz@shaw.ca
| Material Safety Data Sheet on silica:
OSHA regulatory status |
|
Print this page