
Extrication Tips: January 2014
Randy Schmitz
Features Extrication TrainingWhen it comes to the golden hour, any process, method or tool that helps to reduce that critical time frame for patient rescue is a clear benefit.
When it comes to the golden hour, any process, method or tool that helps to reduce that critical time frame for patient rescue is a clear benefit.
 |
|
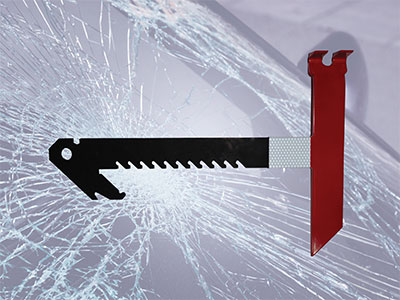
| Photo 1: The X-trication Tomahawk replaces many single-use tools and brings them all together in one handheld unit. It is cost effective, relatively compact and lightweight, which makes it user friendly and effective. Photos by Randy Schmitz |
|
 |
|
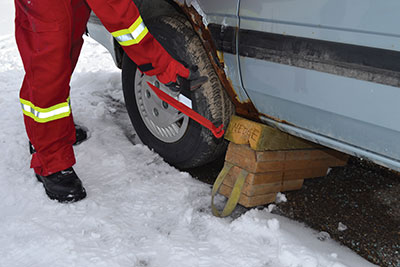
| Photo 2: Once the cribbing is in place, take the weight off the vehicle by tapping the cribbing tight with the curved claw end of the Tomahawk. | |
 |
|
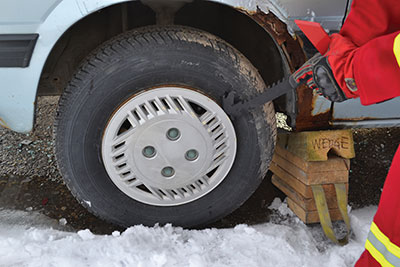
| Photo 3: The tee end of the tool – with its thin, bevelled edge – is designed to remove hubcaps easily. |
|
 |
|
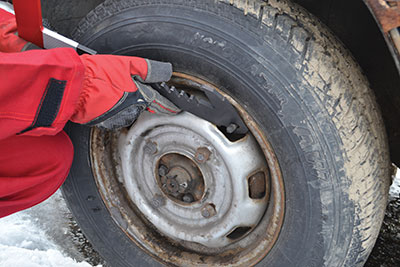
| Photo 4: The same end of the tool that is used to remove the vehicle’s hubcap can also be used to remove the tire’s valve stem. | |
 |
|
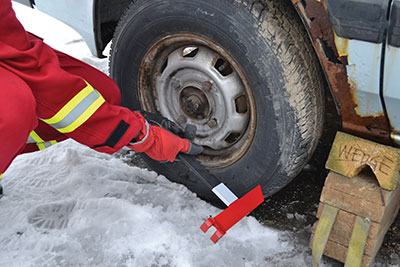
| Photo 5: If the vehicle has stainless-steel valve stems, which are difficult to break off, use the pointed end of the Tomahawk to puncture the side wall of the tire. |
|
 |
|
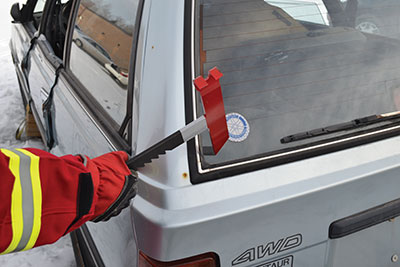
| Photo 6: To break the glass using the Tomahawk, choose a spot as far away from the patient as possible; then give the window a tap and it should shatter. |
|
 |
|
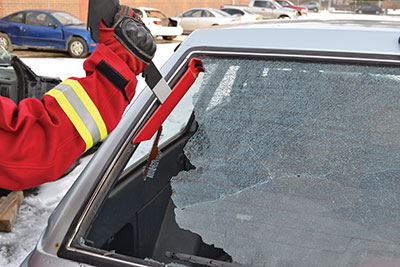
| Photo 7: Use the outer edge of the tool – not your gloved hand – to clean out the remaining glass left in the frame after the window has been broken. |
|
 |
|
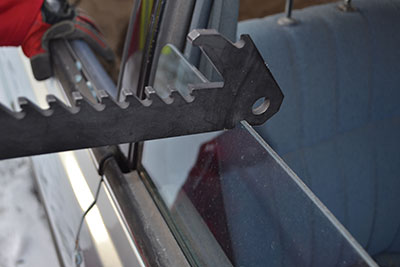
| Photo 8: If the window can be rolled down halfway into the door, use the notched portion of the Tomahawk to break the glass and most of it will fall inside. |
|
 |
|
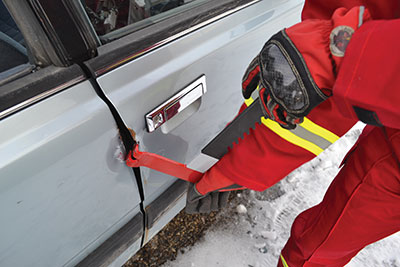
| Photo 9: If a purchase point has not been created as a result of the collision, the curved-claw end of the Tomahawk can be inserted into the door seam and worked to create a space large enough for hydraulic spreader tips. |
|
 |
|
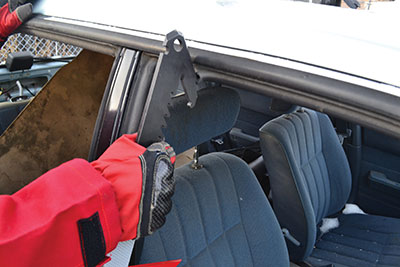
| Photo 10: The tool also has a small hook-like feature for removing the rubber weather seal gaskets around the vehicle body. It is sometimes helpful to remove this seal so that you can see a clear path for your cut. |
|
 |
|
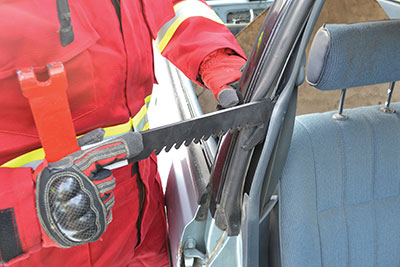
| Photo 11: The bevelled edge of the tool can be used to expose the plastic trim that is hiding the supplemental restraint systems or to remove inside door panels if needed to disengage the lock mechanism. |
|
 |
|
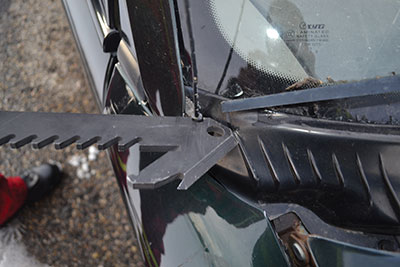
| Photo 12: The notched end of the tool can accommodate the hexagon antenna nut so that the antenna can be removed for safety. |
|
 |
|
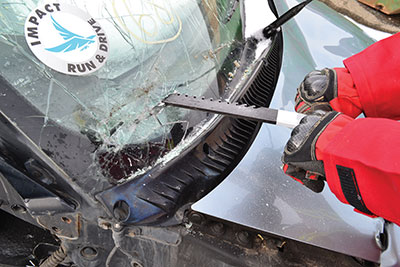
| Photo 13: The edge of the tool is also a glass cutter that will produce large chunks, which will simply drop down, rather than create a fine glass powder that will float around in the air. |
With all of today’s new vehicle technology and the high-strength steel products that have extended the time it takes for rescuers to extricate patients from vehicles, shaving a few minutes off the 20-minute benchmark for patient disentanglement can make a big difference.
One item that can help rescuers be more effective is the X-trication Tomahawk, or XT.
This unique, multi-purpose tool is the latest piece of equipment from Chris Burdyshaw and Jeff Pugh of PXT – Puyallup Extrication Team. Innovators in their own right, these two gentlemen stay on the cutting edge of extrication teaching and use their expertise to make the rescuers’ jobs more effective. Their first innovation was the FRJ or First Responder Jack by High Lift (see my columns from October 2012 and January 2013); the second was the recently released extrication command board specific to rescue. The XT is truly a time saver as it replaces many single-use tools and brings them all together in one handheld unit. The XT is cost effective, relatively compact and lightweight, which makes it user friendly and effective. The well thought-out design gives the user the sense of a systematic approach to “soften” the vehicle to prepare it for extrication, while also performing the necessary basic initial functions that are required at any extrication scene. Tools need to be easily accessible and readily at hand and this tool (see photo 1) does the job.
One of the first orders of business following the initial surveys, hazard assessments and other standard protocols is stabilization of the vehicle. Once the cribbing is in place, tap it with the curved claw end of the Tomahawk to ensure a snug fit and take the weight off the vehicle (see photo 2). An alternative to cribbing alone is to transfer the weight directly to the ground by removing the suspension and taking it out of play; this is done by removing the air from the tires. The tee end of the tool – with its thin, bevelled edge – is designed to remove hubcaps easily (see photo 3). Once the hubcap is removed, the same end of the tool can be used to remove the tire’s valve stem; insert that end into the round hole, use the tool’s leverage against the rim, then the stem will easily pop off (see photo 4). Stainless-steel valve stems used with tire pressure monitoring technology are difficult to break off; instead, the side wall of the tire can be punctured with the pointed end of the Tomahawk (see photo 5); this will settle the vehicle onto the cribbing making it rock solid.
The next step is to gain access to the patient for medical assessment: try before you pry is a must but if no doors or windows open then they must be breached. The same pointed end of the Tomahawk can make short work of the side glass; choose a spot as far away as possible from the patient then give the window a tap and it should shatter (see photo 6). Note: if possible, use Packexe first to control the glass; see the August 2011 issue of Fire Fighting in Canada for more information on Packexe). Use the outer edge of the tool to clean out the remaining glass left in the window frame (see photo 7); never use your gloved hand to remove glass fragments as you could transfer the particles to your patient upon removal. Another alternative is to break glass inside of a door panel for easier glass-fragment containment. If the window can be rolled down halfway into the door, use the notched portion of the Tomahawk to break the glass and most of it will fall inside (see photo 8).
The next step is to gain access to the doors, which may require rescuers to find a purchase point. If a purchase point has not been created as a result of the collision, the curved-claw end of the Tomahawk can be inserted into the door seam. Insert the claw and work the tool up and down to create a space large enough to allow for hydraulic spreader tips (see photo 9).
The electrical shut down of the 12-volt battery is a crucial part of the operation. Again, use of the claw portion of the tool to make a purchase point if the battery is located in the engine compartment.
The tool also has a small hook-like feature for removing the rubber weather seal gaskets around the vehicle body where the door seats itself when closed. It is sometimes helpful to remove this seal if you are going to cut the vehicle body with hydraulic shears or reciprocating saws, so that you can see a clear path for your cut (see photo 10). Once again the bevelled edge of the tool can be used to expose the plastic trim that is hiding the supplemental restraint systems or to remove inside door panels if needed to disengage the lock mechanism (see photo 11).
Have you ever been poked in the face by the vehicle’s antenna when working on the wreckage? Well the notched end of the tool can accommodate the hexagon antenna nut so that the antenna can be removed for safety (see photo 12).
What about removing the windshield? The edge of the tool is also a glass cutter that will produce large chunks rather than fine powder, which will simply drop down rather create a fine glass powder that will float around in the air (see photo 13); the teeth can be sharpened with a round and flat file if they become dull from many windshield removals. Lastly, the claw end can be used to remove the socket end of lift struts that hold up trunk or hatch lids.
In most MVC responses, there is not enough manpower and, frankly, firefighters don’t want to lose their position in the extrication to go look for tools. In some accident scenarios patients and firefighters are put at greater risk of injury due to the fact that they do not have the proper hand tools.
The X-trication Tomahawk, which is available from Ajax Rescue Tools (www.ajaxrescuetools.com). The XT is designed to prompt the user though a systematic approach to auto extrication – stabilization, glass management and trim removal. From my experience, the reason these three basic tasks are not completed at many accident scenes is time: firefighters simply do not want to look for tools or return to the rig to retrieve the specific tools they need.
Randy Schmitz is a Calgary firefighter who has been extensively involved in the extrication field for 21 years. He is an extrication instructor and has competed internationally. He is the education chair for Transport Emergency Rescue Committee (T.E.R.C.) in Canada, a T.E.R.C. & WRO International extrication judge and a tester and evaluator for manufactured prototype products for extrication equipment. He can be reached at rwschmitz@shaw.ca. Follow him on Twitter at @firedog7
Print this page