
Extrication Tips: Lifting procedures for strut systems
Randy Schmitz
Features Extrication TrainingIn the two previous issues (January 2008 and October 2007) we talked about basic stabilization and then moved on to more advanced stabilizing situations with vehicles on their roofs and sides.
 In the two previous issues (January 2008 and October 2007) we talked about basic stabilization and then moved on to more advanced stabilizing situations with vehicles on their roofs and sides.
Here, we’ll focus on lifting vehicles for patient removal using mechanical strut systems.
When presented with situations that require rescue personnel to lift a vehicle for patient removal or to deal with a trapped appendage, one of our first thoughts is to use the rescue lift bags or a hydraulic spreader to perform the lift procedure. These are excellent choices that work quite well when dealing with a vehicle that has all four wheels contacting the ground and in situations where the patient is under a vehicle.
The circumstances change somewhat when the vehicle has come to rest on its side and patients are caught under, or are ejected from/trapped between, the vehicle and the ground.
Another common situation is a vehicle that has left the road, rolled over many times and has a severely crushed roof, with patients trapped. These situations may be the result of highway on/off ramp crashes and poor road conditions that leave the patients trapped on the side slopes of these on/off ramp embankments.
In these types of circumstances, rescuers and patients are subjected to extremely hazardous situations because of the lack of stability of the vehicle.
There are alternatives for safe lifting practices, such as mechanical strut systems with jacking or lifting attachments. These options can solve a lot of problems when put into safe and proper use.
There are many types of strut systems on the market that offer some type of lifting application. Rescue 42, for instance, uses a lifting jack attachment that can move the telescopic strut sections up and down to perform lifting operations.
Res-Q-Jack comes complete with the jack permanently attached and Air Shore, Holmatro, Paratech struts offer compressed-air operated systems. Res-Q-Tek has a threaded screw pin in the middle of the strut body that can lift heavy loads; when the spindle handle is rotated, it will slowly start to lift a load similar to jacking a tele-post in a house.
All of these systems perform the same function – stabilizing and lifting loads. They all have different load ratings so be sure to check that out before you purchase.
The procedure will focus on the proper application of lifting techniques in general, rather than specific strut operations for each brand or company. Each type will have its own precise operational instructions.
The first application we will look at is a lift with the vehicle on its side and a patient’s arm trapped underneath the vehicle.
The strut brand used here is the Rescue 42 strut system with the removable jacks attached to the rear supporting struts.
As always, ensure scene safety and inner/outer circle surveys have been completed prior to any extrication procedures.
The decision to lift or just simply stabilize in place must be made early as strut size, strut placement locations, degree of entrapment and vehicle position may differ for both applications.
 |
 |
| 1 | 2 |
 |
 |
| 3 | 4 |
 |
 |
| 5 | 6 |
 |
 |
| 7 | 8 |
 |
|
| 9 |
Order of operations
Choose which side of the vehicle requires stabilization first, depending on which way it is most likely to roll over.
Securing the vehicle with a winch line, rope, chain or other means may be required to make it safe before working around it.
Perform initial stabilization of the vehicle, (refer to Stabilization 101, part two, in the January edition of CFF for initial stabilization methods).
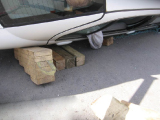
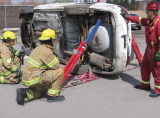
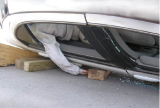
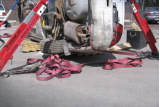
Once this has been done, continue to carefully insert wedges or crib blocks to fill voids where required between the ground and the vehicle. Also crib in the immediate vicinity of the patient’s entrapment area to try to minimize vehicle movement and reduce aggravating the patient’s injuries. (See 1.) As mentioned in January, if manpower permits, commit a team member to put a hand on the vehicle at either end to monitor any movement while the strut system is being put into place. Be ready to warn rescuers if the vehicle has the potential to shift or to continue to roll over. (See 2.)
Assemble your particular strut system according to manufacturer’s suggested guidelines. Position struts while keeping in mind where medical personnel will enter the vehicle, patient position and egress options. This will ensure a potential egress path is not blocked off.
During assembly, make sure the struts are placed at an angle that is between 45 degrees and 70 degrees to keep a proper stable lifting triangle. This is an important factor for all types of strut systems.
Find a suitable location in which to insert the strut heads, such as the upper frame rails and trunk lid seams. The strut base plates should be kept in line with each other. Otherwise, when the ratchet strap that hooks the two plates together is tightened, the plates will shift to form a straight line to each other, which will cause unwanted movement.
When all of the strut components are in place, safety checks are done and the lifting operation is ready to commence. There should be two rescuers to operate the lifting mechanisms and two rescuers to insert cribbing from either side of the vehicle.
If a lifting height of more than 12 inches is required, crib locations may need to be slightly offset. This will ensure that the crib stacks will not run into each other as they are inserted from the opposite sides of the vehicle.
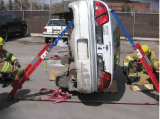
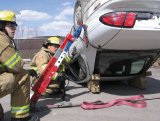
Always try to position the cribbing on rocker channels or other structurally sound portions of the vehicle. (See 3.)
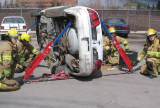
Listen intently to the officer in charge of the lifting operation, as he should be in a bird’s-eye-view location to monitor the situation from the proper perspective. (See 4.) Any freelancing from the lift crew could have dire consequences during a lift.
Once given the command, rescuers should start the lift very slowly, consistently and at an even pace. Be ready for periodic freezes of the operation to re-check the strut components and cribbing around the vehicle. As the vehicle starts to rise, keep a close eye on the patient and monitor constantly. Continue to lift until there is sufficient room to remove the trapped patient. (See 5.)
Crib up tight to the vehicle and slightly lower the load onto the support cribbing to take the weight, pin or lock off strut-system components for load security. The patient can now be prepared for removal.
Common problems and solutions
When side-to-side load shift is predicted, you may carefully attempt to equalize the load by lifting up on one side until you are confident that stability has been achieved.
If load shift is imminent and further movement will certainly risk patient injury, additional load-rated ratchet strap(s) or a come-along can be added to either side of the strut base plates and back to the lower part of the vehicle to ensure it will not shift in either direction. This has very effective results. Make sure there is not too much tension on the straps or come-along as the load continues to be lifted. (See 6.)
To minimize forward load shift during lifting operations, it is important to wedge or crib the opposite end of the vehicle between the ground and the vehicle being lifted. This will keep the vehicle from moving forward as the lift angle increases.
If the vehicle is badly damaged and the integrity of the metal is in question, a three-eighths rescue chain can be used to support the load. (See 7.) Chain slots engineered into the strut head are common with a few different brands.
When working with soft ground conditions where the ratchet straps cannot be inserted under the vehicle body to attach base plates together, metal pickets or stakes can be driven into the soft ground through holes that are engineered into the base plates.
A little planning will go a long way prior to inserting the pickets. If not placed correctly or at the proper angle, the jack-cranking handle may come in contact with the pickets as it is operated during the lifting procedure. Pickets should be used only when ground conditions are suitable to hold a load.
If you are dealing with extremely soft conditions such as mud, you can spread out your base plate surface area by putting down three-quarter inch plywood. Twenty-four-inch by twenty-four-inch pieces are ideal as most rescue trucks carry these for lift-bag platforms. You may even be able to use your aerial outrigger pads for support underneath the base plates if that particular apparatus is present at the scene.
Other possible options for struts
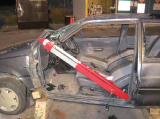
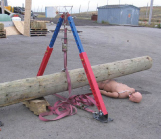
Strut systems have multiple uses and can be used to perform a dash roll if necessary (see 8), or to lift a pole and other heavy objects. (See 9.)
If the strut system does not have a jack attachment or a means of lifting mechanically, an option is to attach a come-along to the base plates when the struts are set up in a triangular configuration.
The come-along can be used to slide the base plates closer to one another; the force of the plates being brought together will cause the load to be forced upward a short distance, enough to create space under the vehicle or load.
Be aware that the closer the base plates are brought together the less stable the load will be.
Important safety tips for crew members
While in the immediate vicinity of the vehicle, always be on one knee while working low to the ground. This position allows the rescuer to be in a state of readiness and offer a better chance of getting out of the vehicle fall zone in case of load or cribbing failure.
Never turn your back turn while working in the vehicle fall zone.
Ensure no more than a one-inch gap at any time between the support cribbing and the vehicle. Lift an inch, crib an inch!
Never put fingers or hands under the load.
Be sure to maintain control of the load at all times.
Know your load ratings! Make sure the strut-system capacity is not extended beyond its specifications.
Conclusion
Strut lifting systems are another multi-purpose lifting tool. They may not always be your first choice for a simple lift but when a complex lift is required they are hard to beat.
Calgary firefighter and extrication instructor Randy Schmitz has been involved in the extrication field for 16 years and has competed in all levels of extrication competition including world challenges.
Print this page