Extrication tips: Strut into autumn
Chad Roberts
Features While applications can range from simple to advanced, the main idea of the strut is to widen and support the vehicle footprint.
Now that the world is finally getting back to some sense of normalcy (for the time being), we’ve also seen our training pick back up as well. With that being said, I thought I’d touch on the broad topic of stabilization struts. In a rescue world surrounded by the need for us to be versatile, we can very quickly get confused as to what struts are the best for every application. And, to be brutally honest, struts can be very similar to hydraulic tools in this sense. All are great for specific applications, but to truly understand what type you may need, you have to have a basic knowledge of what struts are used for in the vehicle rescue application, and from there you can make a better decision on which is right for your team.
I’m going to quickly touch on some of the basics and create a better understanding of the vehicle stabilization strut, their purpose and best use. In future articles we’ll go into best practices related to struts and accessories, and finally will touch on some of the expansive application of these struts that go well beyond the extrication world.
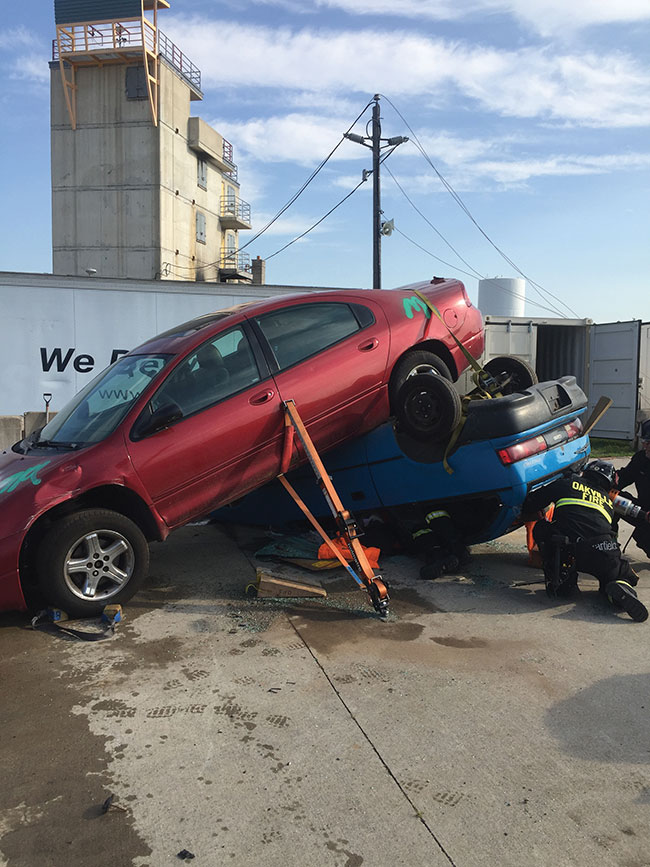
First off, let’s talk about why the strut has been introduced. At first glance of an accident scene, we may be inclined to just throw a strut or two under the side that the vehicle is leaning to. While this may be true in situations where a vehicle is resting in an extremely precarious position, the idea behind the strut is to create a wider foot print for the unstable vehicle. Enter the tension buttress system. This is the application of the strut to a higher point on the vehicle and tensioning the base of the strut to a stable lower point on the vehicle to create a wider footprint. While not new at all to the fire service, the tool manufacturers have made the application of this theory extremely quick and simple (but sometimes simplicity can cause us to skip over true understanding).
With the tension buttress system theory behind the strut now explained, let’s take a look at weight application and where they can be used. This is where we must go back to the buttress theory and understand that these struts are more designed to increase footprints rather than support entire weight loads. While your struts may be rated for weight capacities well above 10,000 pounds, we must think about the weakest point in our systems, just like we do for a rope rescue system. Many of the times this weak point is how we attach the base of our struts either to the vehicle itself or to another strut. Depending on the strap you use, the actual WLL (working load limit), not the MBS (minimum breaking strength), is the number we have to be concerned about. Very often this number is much lower than our actual strut capacity and coupled with the angle our base is at, can cause even more stress on the system (will discuss this in the upcoming January edition’s article).
Moving on to basic application. The versatility of the strut is truly amazing and continues to have further applications every day in vehicle rescue and beyond. For the simplicity of this article, we will talk about the main applications. The first application is for the vehicle on its side. Given that the vehicle positioning is roughly 60 to 90 degrees perpendicular to the surface it is resting on, the main application for the struts should be on the underside of the vehicle in between the two axels. On the clean side of the vehicle we will place cribbing or step chalks in the void areas to keep our working area open for a good extrication path. The struts on the underside will give us a much more stable footprint, however let’s remember that for vehicles leaning more than 60 degrees (and depending on what type of surface it’s resting on) may require strut application the clean side of our vehicles to prevent it from rolling. Another option to combat this is to tie back the underside of the vehicle with come alongs, winches or other means to prevent the vehicle from rolling, while bringing the vehicle to rest on our struts in place, therefore adding to that wider footprint.
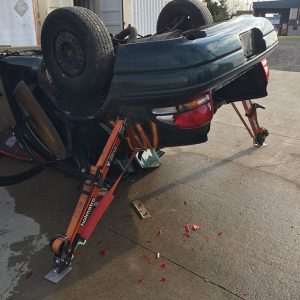
Next is our vehicle on its roof. The application of struts on a vehicle in these situations can greatly increase our extrication paths. While in past, the building of box cribs to support the back side of the vehicle would severely hamper one of our biggest extrication windows. With proper application of the struts at the rear of the vehicle and minding the strap properly, we can affectively stabilize our vehicle and keep the rear window and trunk area open for a much larger extrication path if needed.
Now for the most difficult part of strut application, the head placement and the base attachment points. All manufacturers have different head styles and designs. The main premise is the same, where the head is designed to cradle, bind into or take advantage of pre-existing openings or structural strong points. Creating holes with a drill or removing glass to take access strong points such as pillars are some simple ways we can help ourselves out when looking for head placement. For the base application, this is where we have to be very mindful to pick a solid anchor point. If we are not attaching to another strut base plate, we must keep in mind that the strapping or chain we use is generally our weak point, therefore we have to keep strong, unmovable anchors is mind. The use of chain hooks and clusters are great additions to any strut package to help make use of smaller holes or areas not accessible for your straps or chains.
This brief overview of the main concept and applications of struts in the vehicle rescue world provides very important concepts that are needed to be understood to be able to apply struts to more advanced situations. In the next edition of Extrication Tips, we will talk about different types of struts, their weight capacities, and respective versatility that may guide you to choose which is best for your team or department.
Chad Roberts is a firefighter in Oakville, Ont. He is a member of the Oakville extrication team and competes and trains across North America. Contact Chad at chadroberts12@gmail.com.
Print this page

