Extrication Tips: What’s one without the other?
By Chad Roberts
Features Training Week editors pick firefighter training firefighters training Photo credit: Chad Roberts
 Two is always better than one, right?
Have we ever stopped to think about why we’re always doing things in pairs within the fire service? Surely the safety factor is a key element, but it is truly more beneficial to have that extra hand when it comes to any job we are performing in our service. From the haligan and axe to the defib and compressions, our profession could never thrive without hand in hand, two-person teamwork.

Photo credit: Chad Roberts
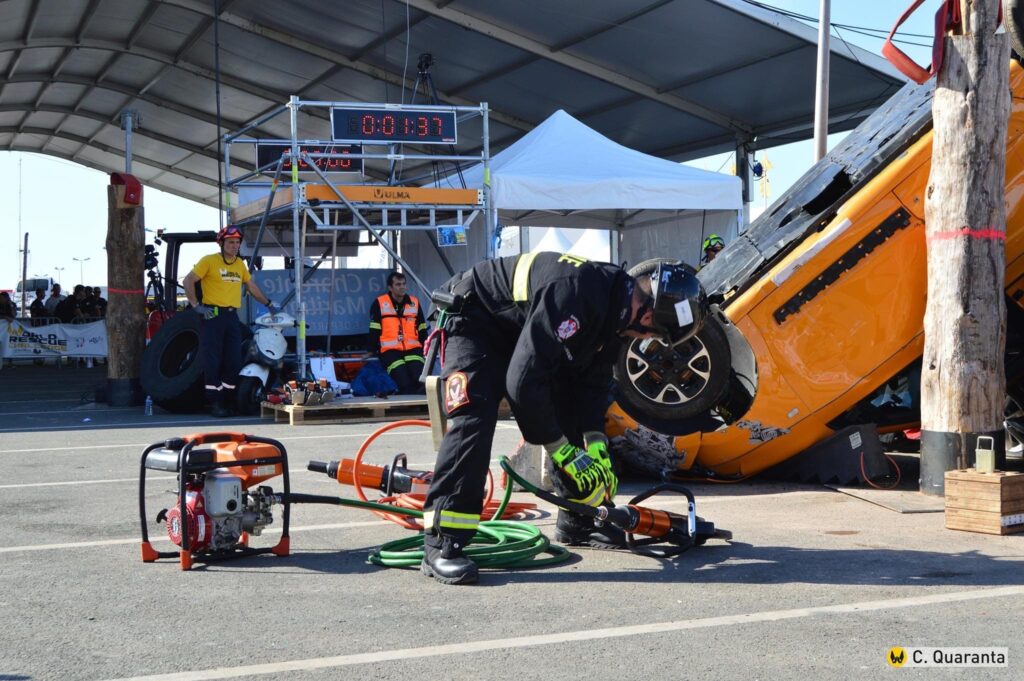
To bring this more in context in our rescue environment, I wanted to address the close relationship we need to understand and embrace with our spreaders and cutters. When we think of the combination tool, we see the benefit of having a tool with a spreading and cutting capability, but with noticeably less efficiency. With new vehicle technology and high-strength steels, we need to maximize these inefficiencies. While manufacturers are developing more capable lines of tools, as rescuers we must constantly find new ways to utilize these tools to not only defeat the new vehicle challenges, but also increase our speed and efficiency while on a call.
First will be one of the simplest examples of the cutter/spreader marriage and it involves one of our most common maneuvers: the door removal. After gaining an initial purchase point, when you start to tunnel your way down the Nader pin or latch, you can often run in to difficulties with metal tearing. Instead of continuing to struggle with this problem, understand that once you can visually see that mechanism or latch and are confident the cutter tips will be able to fully encompass it, step aside and let your cutters finish the job. While no one wants to step back from finishing the job, that is hardly the case. Bringing in the more efficient tool to finish the job will give free up the spreaders to start hinge removal.
The same can be said for a door removal started from the hinge side of the vehicle. Use the spreaders first to gain access to the hinges by creating a purchase point using a window tent or similar technique. From here, the top hinge can be defeated with the spreaders, or if exposed enough it can be cut with the cutters. The more important part of this tool partnership is the removal of the bottom hinge. After conquering the top hinge with the spreaders, continue tunnelling your way down to the bottom until your cutter blades can fully encompass and cut the last hinge. Where this can become even more beneficial is in newer vehicles; not only does this free up your spreader for possible usage on the remaining door mechanism/Nader pin, but it also allows for a much safer release of the door. Newer vehicle technologies and designs have created much stronger components, which includes the hinges. When the bottom hinge is defeated by the spreader, there can be a risk for the door to become a projectile if not secured properly with webbing or other means. Using the cutter instead for the last hinge will allow for a safer and more predictable release of the door.
It’s very important to understand that, while they’re designed for different applications, they can be very effective when used together.

Photo credit: Chad Roberts
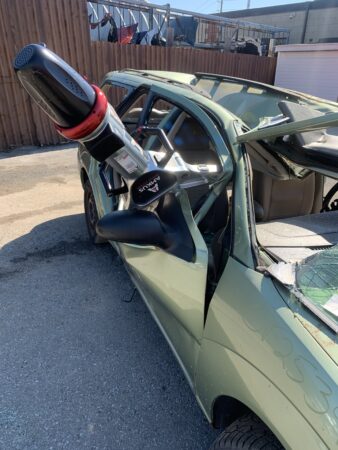
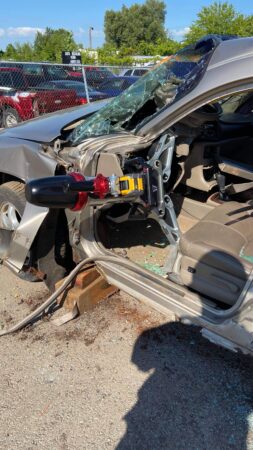
Another option to combine the cutter and spreader is the safe release of stored energy. Even more prevalent in new vehicle technology and high strength steels, when these vehicles are involved in a collision and we are dealing with a possible crush injury, these metals can have even more strength than when in their original form. This translates to a high amount of energy that is released and potentially be transferred to our patients. A good example of this would be when we have a heavy front-end impact, and the dash is sitting on our patients lap, or even an instance where a roof has been crushed down on our patient’s head. If relief cuts are being made with the cutters, and the spreaders are used to preload the dash (see image), the potential stored energy will be absorbed by the spreaders—not our patient. The same can be said about the roof crush; by using the spreaders to tent the window, if a cut to the upper B post needs to be made (ie; a full side removal), most of the stored energy in the roof will be captured with your spreaders and keep the roof from coming down further on your patient.
While this is only a couple common examples of how the close relationship between the cutter and spreaders can be utilized, it’s very important to understand that, while they’re designed for different applications, they can be very effective when used together. Even more prevalent is the need for us to train for this and have cutters and/or spreaders staged and ready on hand so operators can be quickly swapped out to utilize both tools efficiently and without delay in operations.
Chad Roberts is a firefighter in Oakville, Ont. He is a member of the Oakville extrication team and competes and trains across North America. Contact Chad at chadroberts12@gmail.com.
Print this page
- From Hire to Retire: Wearable technology: Revolutionizing firefighter health and well-being
- Newton swivel chute